This article is the continuation of an earlier article on downloading and processing of Cartosat DEM.
https://gisoutlook.com/index.php/2020/08/24/how-to-download-cartosat-dem-through-bhuvan-portal/
In this article, the processing of DEM is explained such as re-projecting, clipping and filling the Gaps, and removing errors present in DEM. These corrections can be performed using GIS functions. Reprojection is needed for correcting geometric errors present in DEM as well as converting the projection system from one to another.
GIS tools can be used to Clip DEM and it is very important, especially for watershed delineation, for this clipping boundary based on study will be used. Error present in DEM is defined as sudden extreme high and low values occurring in comparison to surrounding values.
Step 1 –
Re-project the mosaic DEM using QGIS
Here we will change the CRS from Geographic to UTM. For this click on Raster then Projections followed by Warp (Reproject).
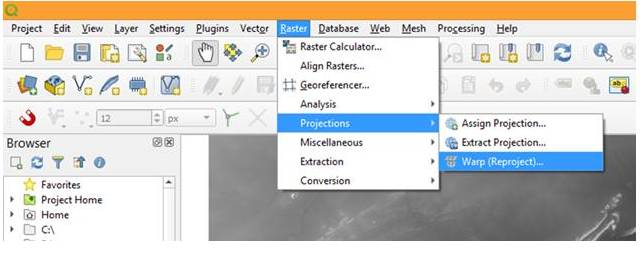
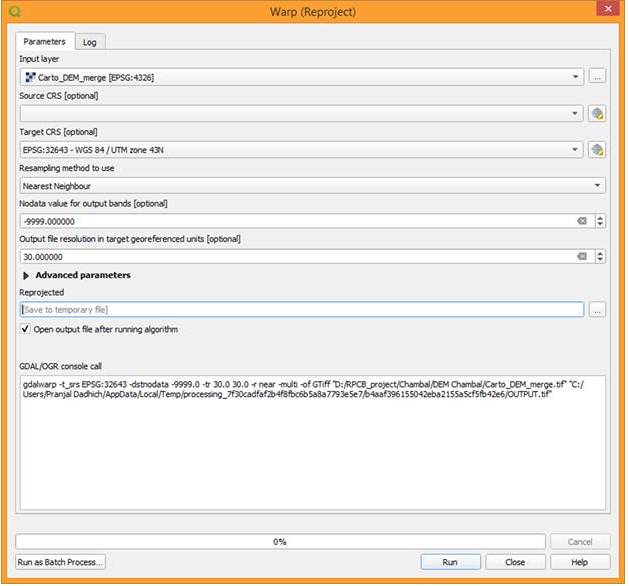
Warp (Reproject) window will popup. Here define Input layer and Target CRS (Co-ordinate Reference System) i.e. we will reproject the DEM from unprojected (Lat/Lon WGS 84 – EPSG: 4326) to UTM Zone 43 North / WGS 84 (EPSG: 32643) for our study area.
Select the Resampling method Nearest Neighbour. Define No data values as -9999, so that no data values will not be visible as data. Set output file resolution to 30 m, because freely available Cartosat DEM is resampled to 30 m.
Now define the output file in Reprojected. Check the check box ‘open output file after running algorithm’ and Click ‘Run’. When process is finished, close the window
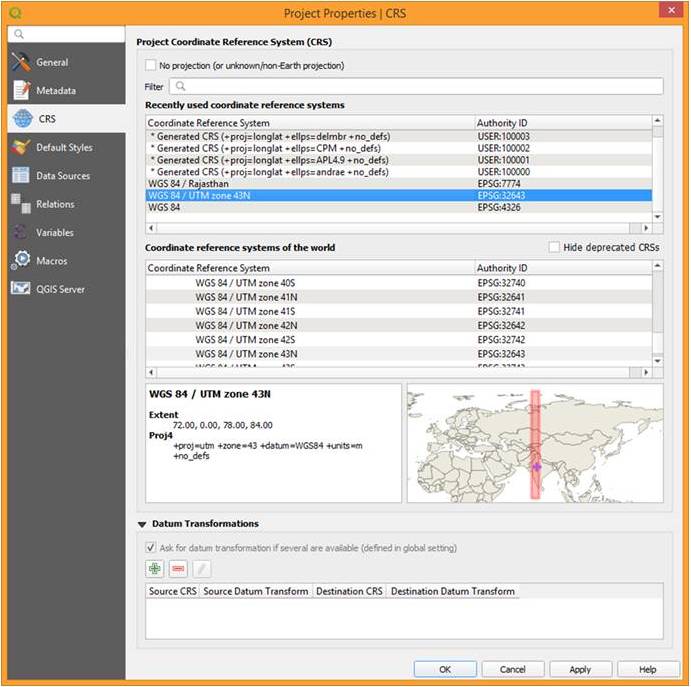
*To properly visualize the reprojected DEM on Map Canvas, you have to change the Canvas projection also. In the lower part of the Map Canvas, your Canvas Projection is still in Lat/Lon, so click on the EPSG: 4326 as highlighted with the red box
Project Properties-CRS will pop up. Here select EPSG:32643 and click OK.
Now your DEM is corrected in position on Map Canvas and coordinates of the DEM are also displayed in meters.
Step 2 –
Clip the Re-projected DEM using QGIS
In case DEM data cover large areas than the study area, so it is advised to subset the DEM data and make it smaller. This will help to reduce the processing time.
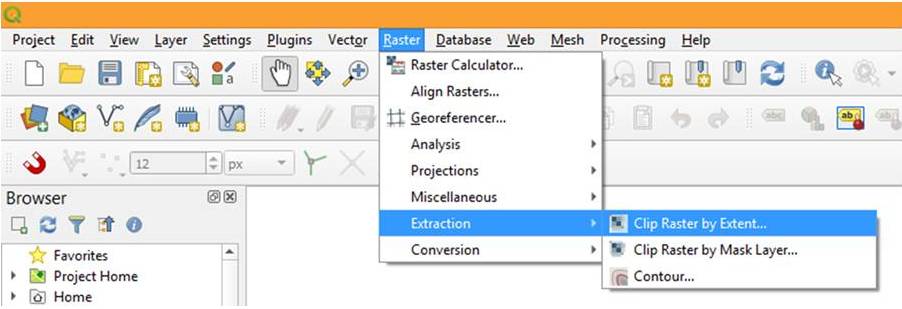
For subset of DEM data go to Raster then Extractionfollowed by Clip Raster by Extent
Here define Input layer with dem_reprojected. For Clipping extent, click on Select extent on canvas.
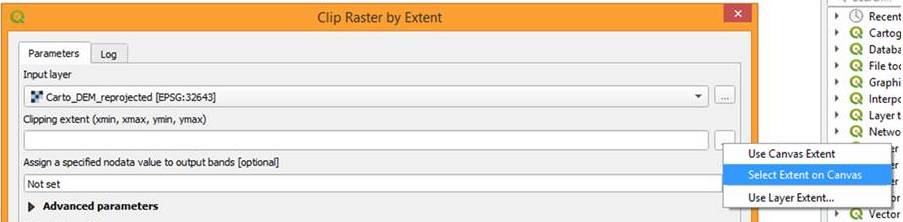
Draw the box on DEM in Map canvas for area selection and define output file in Clipped (extent). Click ‘Run’. When process is finished, close the window.
Now you can remove all the layers from Layer List except subset DEM layer.
Step 3-
Fill sinks
Raw DEM may have some errors such as sudden depressions and peaks. These errors need to be removed before the further use of DEM for hydrological analysis, catchment, stream delineation, hydrological modeling etc.
There are several methods through which such depression and filling sinks can be removed.
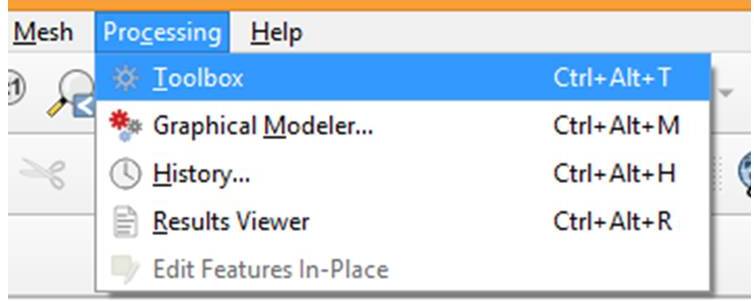
For this one can use the QGIS Processing Toolbox from Main menu.
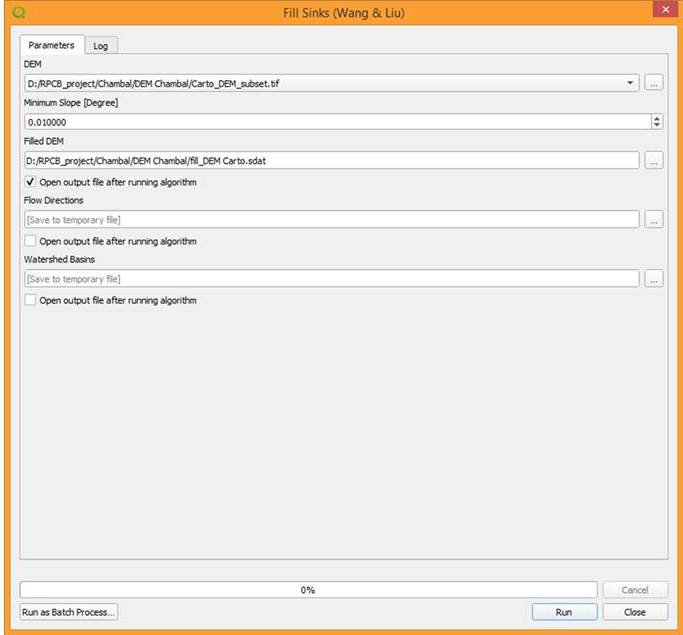
Click ‘Run’ and when processes is finished, close the window.
Step 4-
Calculate Strahler order
Before delineating the streams from DEM one should calculate Strahler order. Strahler order indicates that higher the order, bigger will be the stream.
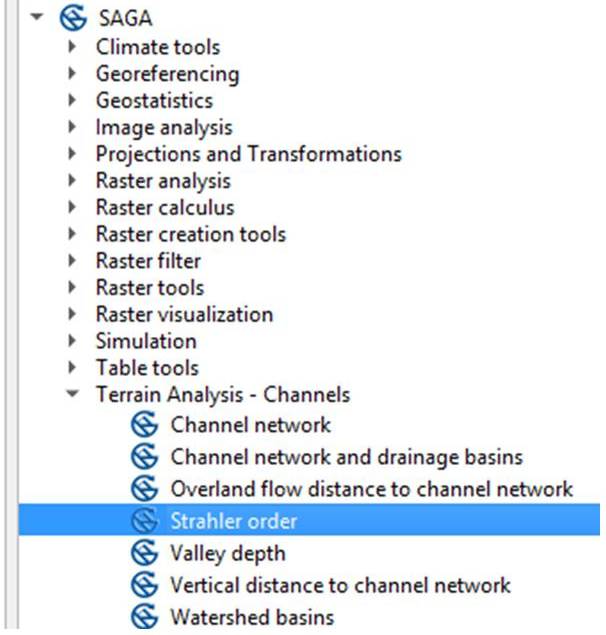
In the Processing Tool Box, select SAGA followed by Terrain Analysis – Channels. Then in Terrain Analysis – Channels, click on Strahler order.
Strahler order window will popup. Here you have to define fill_DEM Carto in Elevationand output file in Strahler order (eg. Strahler_DEM Carto.sdat)
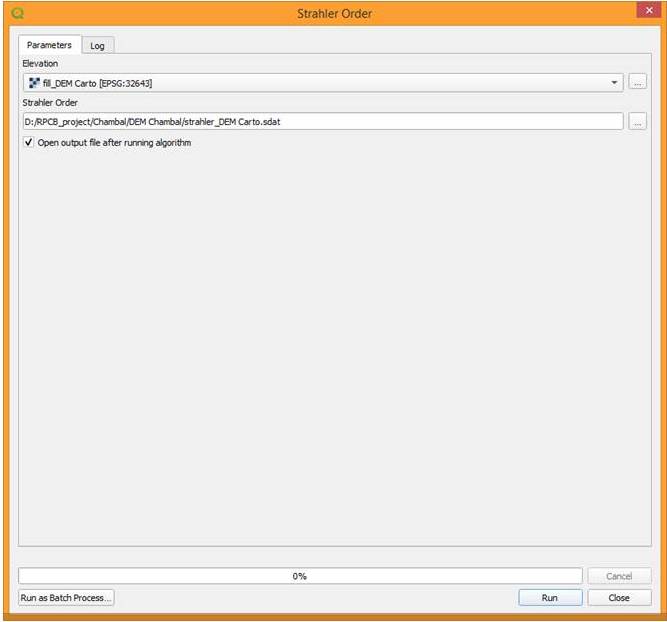
Click ‘Run’ and when processes finished, close the window.
*Check the minimum and maximum values from the output file(eg. Minimum is 1 and maximum is 12 in our study area) and find out the suitable threshold values using the raster calculator.